Newsletter

Wednesday, 4 December 2024

Let it snow!


I still have a few cards to add to my stash so I went with
a quick and easy one.
I found two sheets in a pack that had the little snowman
still in tact so I cut him out and saved him for my card.
With the rest of the sheet I ran it through my cutting machine
using a die called Patchwork Pieces (SU).
When cut I inked the edges of each piece then put
back together for my background.
I embossed the base of my card with a holly folder from
Tattered Lace. Added my die cut pieces then
added some snowflakes cut using a Tutti Die.
I finished it off with my little snowman and
some punched circles and a sentiment from Snowman Season stamps. (SU).
I added some sparkle sequins to the snowflakes.

I would like to enter this into


Tuesday, 3 December 2024

Let it S.N.O.W.


It's the second week of Sandie's LETTERS theme over at

This week I found some colourful letters leftover from a
paper pack so I hunted out the letters for snow.
I made a tag base using blue and lime green card.
Using embossing paste and a snowfall stencil from
Polkadoodles I covered the blue background in snow.
I then stamped the snowman from Spirited Snowmen (SU),
coloured him up with markers and cut him out.
He was stuck in place. I then inked round the edges of
my cut up SNOW letters and stuck them in place.
I stamped let it from Snowman Season stamp set in blue
and added the to my tag.
It was finished by shaping the top and added some
green ribbon.

 I would like to enter this into

Hope you get time to join us!


Monday, 2 December 2024

Stash Buster 7


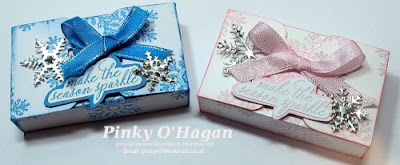
I designed these gift holders a few months back
but only got the chance to make the video!
You just need a 6" x 6" sheet to make one
and they are the perfect size for money or gift card
with a little tag at the back to write on.


This is the back pocket for the tag which you could
add some decoration to if you were inclined.


I have made a bunch to have for a lot of occasions
as that is mostly what we give as gifts now.

You can watch my video tutorial here

Measurements needed to make one
Double sided dsp 2 pieces - 6" x 3"
Score one sheet at 2 1/2"
Score one sheet at 2 1/2", 5 1/2"
Some card to match for decoration
White card for tag - 3 1/4" x 2"

Items I used for mine
Circle Sayings, Warm Hugs and Itty Bitty Birthdays (all SU)
random papers from stash, bow die, melon mambo ink and card

I would like to enter these into

After such a warm night it is now freezing cold and
the wind would cut you!
Walk done, hubby heading to golf so
after a tiny bit of housework I will finish off
bits I need for Christmas.
Who has their tree up?
I need someone to give me a shove in that direction!!

Sunday, 1 December 2024

Double Post today!


Firstly, it is time for our December challenge over at
where the theme is anything goes option Winter.

We have some lovely prizes up for grabs so be sure and join us!!

For my card I have gone with an AALL & Create stamp called
brum brum. I built up the background using the tree from the car
and the stars from the same stamp set.
It has all been coloured using my markers and the background
has been inked and dotted with snow.
The background papers are from a set called Winter Meadows (SU).


As you can see I have gone mad with the glamour dust!!


And I even finished off the inside!

I would like to enter this into

****************************************************************

So for my second post!
I was invited to join the lovely ladies over at
and my resistance was just too low to say no!!
I will be beating myself up though as I can no longer have
a chance of winning the fabulous prizes each month!!

But anyway, the challenge theme for December is also Winter
so you now have two challenges to enter your cards!!

At We Love Stamping the December prizes are amazing too
so be sure and enter!!


So for my card I have gone with a winter tree scene.
I used an old stamp set called Winter Woods (SU) which I love
playing with. The inks I used are shaded spruce and tahitian tide.
I stamped the trees first then went over them with a stencil
called Snowfall from Polkadoodles using my embossing paste.
When dry, I wrapped it with some twine, added two die cut snowflakes
and finished with a little bow in the centre of them.
I then stamped the sentiment and cut and stuck in place.

I look forward to seeing your wonderful makes this month!

I would like to enter this into

Related Posts Plugin for WordPress, Blogger...