Newsletter

Tuesday, 12 March 2019

Envelope punch board customer gifts


My Tuesday tutorial shows how I made these cute
envelope boxes to hold some Hershey Bars and a tea bag treat
for my February customers.

You can watch the video here


Measurements needed to follow along:
Paper - 5 1/2" square
1st punch - 2"
2nd punch - 2 1/2"

I would like to enter this into:


Product List


Keep blog land alive by commenting and following blogs.
I am on the lookout for new bloggers, so follow me or leave a comment
and I will come check you out!
 Thanks for dropping by today.


DURING SALE-A-BRATION AND CHOOSE FROM TWO OPTIONS

Option 1-Enjoy £170 worth of craft goodies of your choice for £99
Option 2 - Enjoy £170 worth of craft goodies + the fabulous tote bag for £125

Those leaving a comment on any post on this blog do so in the knowledge that their name and blog link are visible to all who visit this blog.
I personally, do not use any of your information.


Monday, 11 March 2019

Butterfly Gala birthday card


I have started into my April birthday list as we have lots of birthdays that month.
This one is for my daughter from her Granny.
I have used the free Botanical Butterfly papers teamed up with black card
and lemon lime twist ribbon.
I used the large number framelits which, sadly, are no longer available.


How I made this card:
1. Cut piece of black card to fit your card base.
2. Cut piece of dsp to mat onto black.
3. Cut the dsp into 3 pieces,  making sure your middle piece is at least 2 1/2"
4. Adhere top piece to black, flip middle piece over to other design and stick down,
then stick third piece in place.
5. Add double sided tape to cover the joins top and bottom and cover
with matching ribbon.
Adhere this to your card base.
6. Cut your numbers out in same dsp as top and bottom panels.
7. Cut same numbers in black fun foam and adhere together.
8. Glue these to the centre panel.
9. Stamp the butterfly silhouette and antenna  to either side of your numbers.
10. Stamp two small butterflies on whisper white and colour with blends.
11. Punch out using matching punch, curl wings and stick over silhouettes.
12. Stamp name and sentiment and cut out using rectangle dies (smallest one)
Use next size up in black and cut two. Layer sentiments and adhere to card.
13. Finish with an enamel dot or pearl and add wink of stella to numbers.

Check out my product list below for everything I have used.

I would like to enter this into:
Pammie's Inky Pinkies - anything goes
Stamps & Fun = CREATIVITY - butterflies
Creative Knockouts - diecuts and/or punches (numbers and butterflies)
Creative Fingers - anything goes
Sweet Stampin' Challenge - anything goes with option


Product List
Keep blog land alive by commenting and following blogs.
I am on the lookout for new bloggers, so follow me or leave a comment
and I will come check you out!
 Thanks for dropping by today.


DURING SALE-A-BRATION AND CHOOSE FROM TWO OPTIONS

Option 1-Enjoy £170 worth of craft goodies of your choice for £99
Option 2 - Enjoy £170 worth of craft goodies + the fabulous tote bag for £125

Those leaving a comment on any post on this blog do so in the knowledge that their name and blog link are visible to all who visit this blog.
I personally, do not use any of your information.


Friday, 8 March 2019

Amazing Life St.Patrick's Day card


St.Patrick's Day is not that far away and I like to post a card
to my brother and his wife in England.
I kept it nice and simple which I know Tony will like.
St.Patrick's Day is traditionally the first spring cut for the garden,
we have our spring parade on St.Patrick's Day and it's usually
our first trip to Carlingford or Omeath of the year!!
And of course, we wear GREEN!

How I made my card:
1. Mat your card with olive green card stock.
2. Cut a whisper white mat to fit this.
3. Stamp out the 4 leaf clover stamp in olive green and then cut out
3 leaves with no stem and colour using blends.
4. Using a stem stamp (I used one from Varied Vases)
position the shamrocks along the bottom, don't stick down.
Stamp a stem to lead up to each shamrock.
5. When happy, stick the shamrocks in place.
6. Using a piece of Whisper White, draw a straight line
to line up your letters.
7. Start with the St.Patrick's Day first, leaving room above to add Happy.
8. Using old olive Stamp each letter, using the line to keep you straight.
9. Stamp the HAPPY using the first P as your centre letter,
again with a pencil line to keep you straight.
10. When dry, rub out your pencil lines.
11. Mat onto a piece of Old Olive card and add to your card.
Check out my product list below to see what I have used.

I would like to enter this into:
and tying my entry with


Product List
Keep blog land alive by commenting and following blogs.
I am on the lookout for new bloggers, so follow me or leave a comment
and I will come check you out!
 Thanks for dropping by today.


DURING SALE-A-BRATION AND CHOOSE FROM TWO OPTIONS

Option 1-Enjoy £170 worth of craft goodies of your choice for £99
Option 2 - Enjoy £170 worth of craft goodies + the fabulous tote bag for £125

Those leaving a comment on any post on this blog do so in the knowledge that their name and blog link are visible to all who visit this blog.
I personally, do not use any of your information.


Thursday, 7 March 2019

Little Elephant Bundle baby card


We have had a new edition to the O'Hagan clan with the arrival
of a lovely baby girl called Fiadh!
This is my nephew's first little baby and it's so lovely to have a girl
as we tend to have lots of boys on our side!!
So of course, I had to make a cute little PINK card!

How I made my card:
1. Cut a white card base. Mat with petal pink card stock, rounding off the corners.
2. Mat this with a piece of spotty dsp from subtles 6 x 6 dsp.
Again round off the corners.
3. Cut a strip of whisper white to fit across the spotty dsp
and added another strip of the opposite pattern onto this strip.
4. Stamp and punch three elephants in two shapes of pink.
Stamp again and punch out the ears so you can 3d them.
5. adhere the two lighter pink elephants flat onto the middle border.
6. Add dimensionals to the 3rd elephant but stamp the little hearts
onto the border first before adding the elephant to card.
7. Stamp Congratulations in powder pink and punch with classic label punch.
8. Add to card using dimensionals.
9. Finish with 3 pearls.
Check out my product list below to see what I have used.


I would like to enter this into:


Product List
Keep blog land alive by commenting and following blogs.
I am on the lookout for new bloggers, so follow me or leave a comment
and I will come check you out!
 Thanks for dropping by today.


DURING SALE-A-BRATION AND CHOOSE FROM TWO OPTIONS

Option 1-Enjoy £170 worth of craft goodies of your choice for £99
Option 2 - Enjoy £170 worth of craft goodies + the fabulous tote bag for £125

Those leaving a comment on any post on this blog do so in the knowledge that their name and blog link are visible to all who visit this blog.
I personally, do not use any of your information.


Wednesday, 6 March 2019

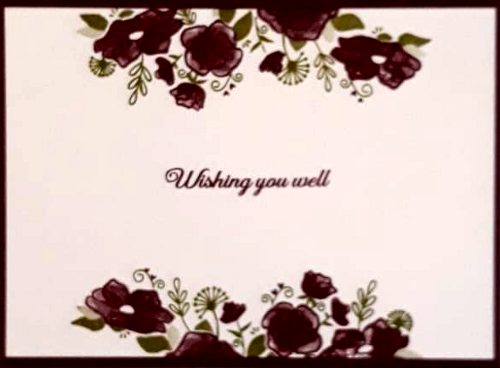
Forever Lovely get well card

Have you been in our top 5?


I had a get well card to make for a friend and this is what I came up with.
I wasn't sure when I first chose the colour. I saw some tulips this colour when out walking the dog
 and I really liked the richness of the colour.


How I made my card:
1. Make the card using Fresh Fig card stock.
2. Cut a piece of whisper white to fit and stamp the leaves first, in Old Olive.
3. Now stamp the flowers in fresh fig over the top of your leaves.
This is much easier using the Stamparatus.
4. Stamp the sentiment in fresh fig ink.
5. Wrap a piece of fresh fig ribbon on left of card.
6. adhere it all to the card base.
7. Make a bow in matching ribbon and adhere to ribbon band.
8. Follow the same procedure inside, stamping top and bottom
and sentiment in middle.


Check out my product list below to see what I used for this card.

I would like to enter this into:
Allsorts - favourite season (Spring)
You never know what's going to appear!
Crafting by Designs - anything goes
Addicted to stamps and more - anything goes
Papercraft challenges - clean and simple
Crafty Sentiments Designs - anything goes


Product List
Keep blog land alive by commenting and following blogs.
I am on the lookout for new bloggers, so follow me or leave a comment
and I will come check you out!
 Thanks for dropping by today.


DURING SALE-A-BRATION AND CHOOSE FROM TWO OPTIONS

Option 1-Enjoy £170 worth of craft goodies of your choice for £99
Option 2 - Enjoy £170 worth of craft goodies + the fabulous tote bag for £125

Those leaving a comment on any post on this blog do so in the knowledge that their name and blog link are visible to all who visit this blog.
I personally, do not use any of your information.


Related Posts Plugin for WordPress, Blogger...